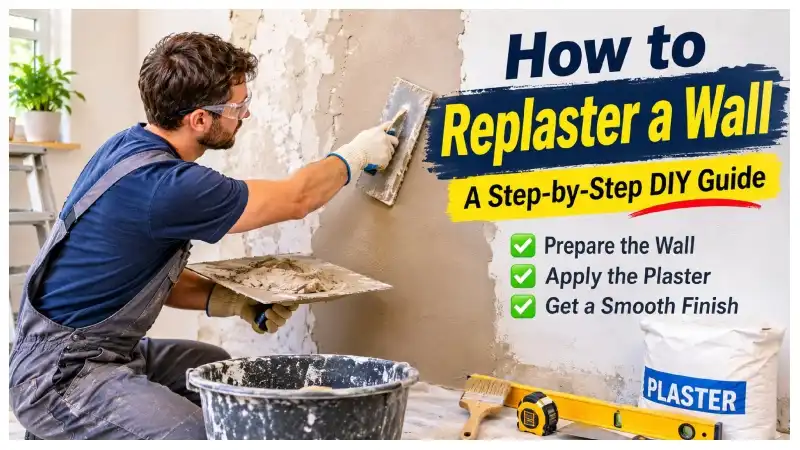
Old, damaged walls can make an otherwise beautiful room look untidy. Cracks, peeling plaster, rough patches, and uneven surfaces often appear as a house gets older. Instead of living with these imperfections, replastering can give your walls a fresh appearance and create a smooth surface for painting or decorating.The good news is that you can handle some replastering projects yourself without hiring a professional. However, getting a good finish requires careful preparation, the right materials, and a little patience.If you are wondering how to replaster a wall, How to Replaster a Wall guide will walk you through each stage, from removing damaged plaster to applying the final coat. You will also learn which tools you need, how to avoid common mistakes, and when it is better to call an experienced plasterer.
Why Do Walls Need Replastering?
Plaster protects wall surfaces and provides a smooth base for interior decoration. Over time, everyday wear, moisture, building movement, and poor previous repairs can affect its condition.
Here are some common signs that your wall may need attention:
- Visible cracks: Small cracks can develop with age, while wider cracks may indicate movement or deeper damage.
- Peeling plaster: Loose or flaking sections often mean the plaster has lost its bond with the background.
- Uneven surfaces: Old repairs and damaged areas can leave walls looking rough.
- Hollow patches: A hollow sound when tapping the wall may indicate detached plaster.
- Water damage: Dampness can weaken plaster and cause staining or crumbling.
Before starting, identify the cause of the damage. Replastering over dampness or unstable surfaces will only create problems later.
Tools and Materials Required
Having everything ready before you begin makes the project easier and helps you work without unnecessary interruptions.
Tools you will need:
- Plastering trowel
- Hawk board
- Mixing bucket
- Electric plaster mixer
- Bucket trowel
- Scraper
- Filling knife
- Paintbrush
- Dust sheets
- Safety goggles and dust mask
Materials you will need:
- Suitable plaster
- Backing plaster, if required
- Appropriate primer or bonding agent
- Clean water
- Reinforcement tape for suitable cracks
- Sandpaper for minor finishing work
Choose materials that match your wall type. For example, gypsum plaster suits many modern interior walls, while traditional solid walls may require a compatible lime-based plaster.
Step 1: Prepare the Room Before Starting
Start by clearing the room as much as possible. Remove furniture, pictures, curtains, and other items that could get covered in plaster dust.
Cover the floor with dust sheets and protect skirting boards, door frames, and nearby surfaces with masking tape.
If you are working around electrical sockets or switches, turn off the relevant circuit before beginning. Get a qualified electrician to handle electrical fittings when necessary.
Good preparation might seem like an extra job, but it makes the entire process cleaner and easier.
Step 2: Remove Old and Damaged Plaster
Examine the wall carefully to find loose, cracked, and damaged sections.
Use a scraper or suitable hand tool to remove plaster that has started separating from the surface. Continue until you reach a firm and stable background.
Pay attention to hollow-sounding areas because applying fresh plaster over detached material can lead to further failure.
For small holes, remove loose edges and clear away broken pieces. Larger damaged areas may require a suitable backing plaster before you apply the finishing coat.
One useful tip is to avoid removing perfectly sound plaster. Keeping stable sections can save time, effort, and materials.
If you discover significant structural cracks, extensive dampness, or crumbling masonry, investigate the problem before continuing.
Step 3: Clean and Prepare the Wall
Once the damaged plaster has been removed, clean the exposed surface thoroughly.
Use a stiff brush to remove dust, loose particles, and remaining debris. Check for old wallpaper adhesive, grease, paint, or other materials that could interfere with adhesion.
The wall needs to be clean and stable before you apply new plaster.
Also check whether the surface absorbs water quickly. Highly absorbent backgrounds may need a suitable primer or preparation treatment to prevent them from drawing moisture out of fresh plaster too quickly.
Never ignore signs of mould or dampness. Resolve the moisture problem first rather than covering it with another plaster layer.
Step 4: Apply a Suitable Primer or Bonding Agent
Different wall surfaces need different preparation methods.
Some old plaster and masonry surfaces absorb water quickly, while smooth painted surfaces may provide poor adhesion.
Choose a primer or bonding agent specifically designed for your wall and plaster system.
Apply it according to the manufacturer’s instructions. Some products need dilution, while others require a particular drying time before plastering.
For smooth surfaces, use a suitable bonding product that improves the grip of the new plaster.
Avoid choosing a product simply because it is commonly used in DIY projects. Compatibility matters more than popularity.
Step 5: Mix the Plaster Properly
Correct mixing makes plaster easier to spread and helps produce a consistent finish.
Take a clean bucket and add the recommended amount of fresh water. Gradually introduce the plaster powder while mixing with an electric paddle.
Continue until the mixture becomes smooth and free from lumps.
The consistency should be workable enough to spread across the wall without running off the trowel.
Keep these points in mind:
- Always follow the manufacturer’s mixing instructions.
- Use clean water and equipment.
- Avoid adding too much water.
- Mix manageable quantities rather than preparing everything at once.
- Do not try to revive plaster that has already started setting.
Poor mixing can make plaster difficult to apply and may affect the finished surface.
Step 6: Apply the First Coat
Now comes the main part of the job: applying the plaster.
Place a manageable amount of plaster on your hawk board. Use the trowel to pick up the material and spread it across the wall.
Begin near the bottom and work upwards using steady, controlled movements.
Hold the trowel at a slight angle and apply even pressure. How to Replaster a Wall helps distribute the plaster and reduces the chance of creating thick patches.
Work across small sections instead of trying to cover the entire wall at once.
If you are repairing deep holes or missing sections, use a suitable backing plaster rather than filling everything with finishing plaster.
The first coat should create an even base for the final finish.
Step 7: Apply the Finishing Coat
After the first coat reaches the correct stage for the next application, prepare the finishing plaster according to its instructions.
Apply a thin, even layer over the surface. Use smooth trowel movements and avoid leaving thick ridges or visible lines.
As the plaster begins to firm up, use a clean trowel to flatten small imperfections.
You may need several careful smoothing passes to achieve the finish you want. Avoid pressing too hard, as excessive pressure can leave marks or damage the surface.
Take your time during How to Replaster a Wall stage. A smooth finish now will make painting much easier later.
Step 8: Allow the Wall to Dry
Once you have finished plastering, give the wall enough time to dry.
Fresh plaster often has darker patches while moisture remains inside. The surface should dry evenly before you move on to decorating.
Drying time depends on:
- The thickness of the plaster
- Room temperature
- Air circulation
- Humidity levels
- The type of plaster used
Keep the room ventilated and maintain a reasonable temperature. Avoid using strong heaters or directing hot air straight at the wall, as rapid drying can cause problems.
Always follow the manufacturer’s drying recommendations.
Step 9: Prepare the Surface for Painting
When the plaster has dried completely, inspect the wall in good lighting.
Look for small ridges, rough patches, and minor imperfections. Lightly sand suitable areas if necessary, then remove all remaining dust.
Fresh plaster usually needs a suitable mist coat or primer before you apply normal emulsion paint.
Choose a product designed for new plaster and follow its application and dilution instructions.
Once the preparation coat has dried, you can apply your chosen paint to complete the renovation.
Common Mistakes to Avoid
Even a simple DIY plastering job can go wrong if you rush through the preparation or application stages.
Here are some mistakes to watch out for:
Plastering over loose material: Fresh plaster needs a stable background. Remove detached sections before applying anything new.
Ignoring dampness: Moisture can damage new plaster. Find and fix the source before starting repairs.
Using the wrong plaster: Not every plaster works on every wall. Choose products that suit the existing surface.
Mixing too much material: Plaster has a limited working time. Prepare smaller batches to avoid unnecessary waste.
Applying thick coats: Excessive thickness can increase drying time and cause cracking. Follow the recommended application thickness.
Painting too early: Decorating before the plaster dries can lead to poor paint adhesion and an uneven appearance.
How Much Does It Cost to Replaster a Wall?
The cost of replastering depends on the wall’s size, condition, location, and the materials required.
Doing the work yourself can reduce labour expenses, but you still need to budget for plaster, primers, tools, and protective materials.
Hiring a professional usually costs more, especially when the wall needs old plaster removed or extensive repairs completed.
Before deciding on your budget, measure the wall and assess how much preparation it needs. A simple skim coat over sound plaster will usually involve less work than repairing a badly damaged surface.
It is also worth comparing local quotes to understand the cost of materials and labour in your area.
Frequently Asked Questions
Can I replaster a wall myself?
Yes. Smaller repairs and straightforward plastering jobs are suitable for confident DIY enthusiasts. However, achieving a perfectly smooth finish takes practice. Large or badly damaged walls may need professional attention.
Can I apply new plaster over old plaster?
Yes, provided the existing plaster is firmly attached, clean, dry, and suitable for the new coating. Remove loose sections and prepare the surface with a compatible bonding product.
How long does replastering take?
The application may take several hours or longer, depending on the wall’s size and condition. Drying takes additional time, so avoid planning to paint immediately after plastering.
Do I need to remove all the existing plaster?
No. You only need to remove loose, damaged, or unsuitable sections. Firmly attached plaster can often remain if you prepare it correctly.
What is the difference between plastering and skimming?
Plastering can involve applying backing coats to build up or cover a wall. Skimming usually involves applying a thin finishing layer to create a smooth surface.
Final Thoughts
Replastering is a practical way to improve damaged walls and prepare them for a fresh coat of paint. Although the process requires patience, the right materials and careful preparation can make a noticeable difference.
Understanding how to replaster a wall helps you approach the project with confidence, avoid common mistakes, and achieve a better finish.
Remember to remove unstable plaster, deal with dampness, choose compatible products, and allow sufficient drying time. If the damage is extensive or you are unsure about the condition of the wall, getting professional advice is the safer option.
With a little preparation and attention to detail, you can give tired walls a cleaner appearance and make your home feel fresh again.For more information visit my webesite.